Search
Basic Messy Bun Hat Crochet Pattern
- Regina P

- Feb 27, 2024
- 3 min read
Updated: Sep 30, 2024
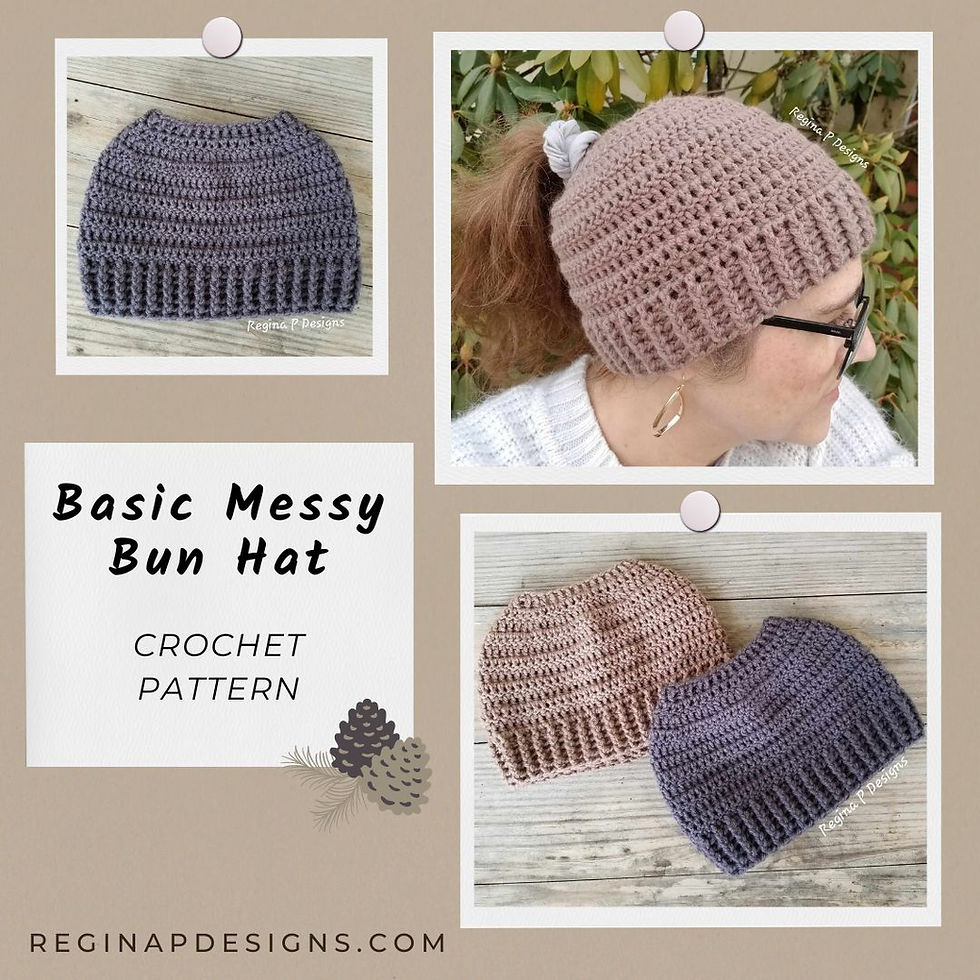
I had an order for one of my messy bun hat the other day and of course I didn't have the color I needed on hand. I pulled out my old trusty chicken scratched on a sliver of crumpled paper pattern that I have been whipping up for YEARS and realized I never typed it up.

This month has been super rough with some crazy bug making it's way through the entire family so I haven't been able to keep up with my blog at all. Since I hadn't made one from this design in probably 5 years I decided to send it out for testing so I could add it here for you all. The pattern is so simple I can make them in my sleep, & they are so warm and comfy, I know because I have been wearing the same one for years now!

I like to use Red Heart Super Saver yarn due to the fact that it seems to hold up really well to wear and washings. Just throw some fabric softener in the wash and then line dry them to avoid pilling and make them much softer. However, feel free to use any WW4/Aran/10ply yarn you have on hand.
Here's what you'll need to get started.......
Materials:
Red Heart Super Saver Yarn(approx. 110 yds)
H(5 mm) Hook
Scissors
Needle
Abbreviations(US Terms):
SK = Skip
sts = Stitches
ST = Stitch
SL= Slip Stitch
CH = Chain
DC = Double Crochet
FP = Front Post
BP = Back Post
NOTES: Finished hat should measure 6.75” tall & 9.5” wide at the opening folded, but will stretch larger. This hat is designed to fit the average adult female head circumference. Feel free to go down a hook size for the last couple rows to tighten up the brim opening if needed. You can also adjust the height by adding or subtracting from the amount of final ribbing rows(14-17).
To begin CH 36 & SL to your beginning CH to connect.
ROUND 1: CH 2(counts as your first ST), DC in each CH around, SL to the top of your beginning CH 2 to connect(36)
ROUND 2: CH 2(counts as your first ST) & turn, repeat [DC in the next 2 sts, 2 DC in the next ST] 11 times, DC in the next 2 sts, DC in the last ST(same ST as your CH2), SL to the top of your beginning CH 2 to connect(48)
ROUND 3: CH 2(counts as your first ST) & turn, repeat [DC in the next 3 sts, 2 DC in the next ST) 11 times, DC in the next 3 sts, DC in the last ST(same ST as your CH2), SL to the top of your beginning CH 2 to connect(60)
ROUND 4: CH 2(counts as your first ST) & turn, repeat [DC in the next 4 sts, 2 DC in the next ST) 11 times, DC in the next 4 sts, DC in the last ST(same ST as your CH2), SL to the top of your beginning CH 2 to connect(72)

At this point your piece should measure 6.5” across and be curling up slightly on the edges.
ROUNDS 5-12: CH 2(counts as your first ST) & turn, DC in each ST around, SL to the top of your beginning CH 2 to connect(72)
ROUND 13: CH 1(does not count as a ST) & turn, beginning on your CH 2 from row 12, repeat(FP DC, BP DC) 36 times, SL to your beginning DC to connect(72)

ROUNDS 14-17: CH 1(does not count as a ST), repeat(FP DC, BP DC) 36 times, SL to your beginning DC to connect(72)
*place FP DC's on FP DC's and BP DC's on BP DC's
Feel free to add more rows of ribbing if needed to add length. Cut, tie off, & weave in your ends.

DON'T FORGET to check out this month's


Comments