
Search
10" Doll Vest Crochet Pattern
- Regina P
- May 28, 2024
- 4 min read
I've been working hard on creating cute little items for a bunch of 10" dolls I picked up for Operation Christmas Child shoeboxes. I absolutely love this mission and have been lucky enough to take part in it with my church for many years now. This year I have jumped on board the organization team and am spending every moment I can gathering up goodies, making items, and encouraging others to do the same. So, to encourage and help all of you do the same I will be adding all my cute little patterns here on my blog over the months for you all to use too.

This vest should fit most any 10" dolls. I grabbed a bunch of these Toymazing Newborn Twin Dolls that came in a set of 2 for $5 from our local Family Dollar store that are just the right size. I plan to do as many as I can for the 5–9-year-old girls age group.


Here's what you'll need to get started.......
Materials:
Mainstays Yarn(approx. 25 yds)
H(5 mm) Hook
Scissors
Needle
3 (10-12mm) Buttons
Abbreviations(US Terms):
SK = Skip
sts = Stitches
ST = Stitch
SL= Slip Stitch
CH = Chain
SC = Single Crochet
HDC = Half Double Crochet
BLO = Back Loop Only
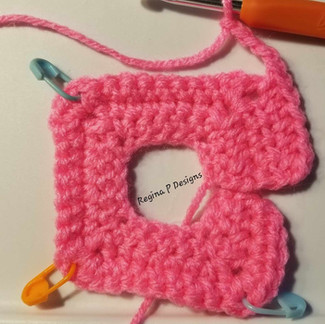
This pattern is worked collar down. Finished vest should measure approx. 9.5” across the bottom and 3” tall. I used Mainstays yarn scraps to create this pattern, but feel free to use whatever WW4/Aran/10 Ply yarn you have on hand as long as you can achieve the finished size.
*PAY ATTENTION TO THE STITCHES! Some are SC & some are HDC. This is done on purpose to achieve to correct height and width to fit the doll body.
To begin CH 21
ROW 1(wrong side): SC in the 2nd CH from your hook and in the next CH, repeat (SC/CH1/SC in the next ST, SC in the next 4 sts) 3 times, SC/CH1/SC in the next ST, SC in the last 2 sts(28 including the CHs)
ROW 2: CH 1(does not count as a ST) & turn, HDC in the first 3 sts, repeat (HDC/CH1/HDC in the next ST, SC in the next 6 sts) 3 times, HDC/CH1/HDC in the next ST, HDC in the last 3 sts(36 including the CHs)
ROW 3: CH 1(does not count as a ST) & turn, HDC in the first 4 sts, repeat (HDC/CH1/HDC in the next ST, SC in the next 8 sts) 3 times, HDC/CH1/HDC in the next ST, HDC in the last 4 sts(44 including the CHs)
ROW 4: CH 1(does not count as a ST) & turn, HDC in the first 5 sts, HDC in the CH SP, CH 5, SK over to & HDC in the next CH SP, HDC in the next 10 sts, HDC in the CH SP, CH 5, SK over to & HDC in the next CH SP, HDC in the last 5 sts(34 including the CHs)


ROW 5: CH 1(does not count as a ST) & turn, SC in the first 6 sts, place 6 SC in the CH SP, SC in the next 12 sts, place 6 SC in the CH SP, SC in the 6 sts(36)
ROW 6: CH 1(does not count as a ST) & turn, BLO SC across(36)
ROW 7: CH 1(does not count as a ST) & turn, SC across(36)
ROW 8: REPEAT ROW 6
ROW 9: REPEAT ROW 7
ROW 10(trim): CH 1(does not count as a ST) & turn, SC in each ST across(36), place a 2nd SC in the last ST & rotate to work along the row ends, CH 2, SK row 9, SC in the end of rows (8, 7, & 6), CH 2, SK row 5, SC in the end of rows (4, 3, & 2), CH 2, SK row 1, place 2 SC in the first starting CH, SC in the next 19 CHs, place a 2nd SC in the last CH & rotate to work along the row ends, place 1 SC in the end of each row, SL to your beginning SC to connect. Cut, tie off, & weave in your ends.
Attach a button to the final side on rows 1, 5, & 9 to correspond with your CH 2 spaces (button holes) on the opposite side.


So if you would like to help, and use up all your scrap yarn, you can come back here and whip up these vests any time. Check your local churches for a drop off location to donate your creations or pack up some boxes yourself. Keep a look out for more patterns coming soon too!


DON'T FORGET to check out this month's


Comments